Friday, April 4, 2014

Lil' Peanuts for Peanuts!

New on LD: Lil' Peanuts Collection! Just in time for spring and Easter, we've created theLil' Peanuts Collection for you and your little peanuts! And we want you to get our new product for just peanuts! Here is how...
Purchase the Lil' Peanuts Cut Bundle and save 40% off. Add in a coupon code on check out and voila...You've gotten Lil' Peanuts (with a cut set and a cut project) for peanuts!
Don't love cut product? That's okay. Purchase the Lil' Peanuts Graphics Collection and save 40% off. Add in a coupon code on check out and voila...You've gotten Lil' Peanuts Graphics Collection (with alphabet, paper pack and graphics) for peanuts!
In April, purchase the new Humpty Dumpty Had a Great Spring Collection at 50% discount exclusively during checkout!
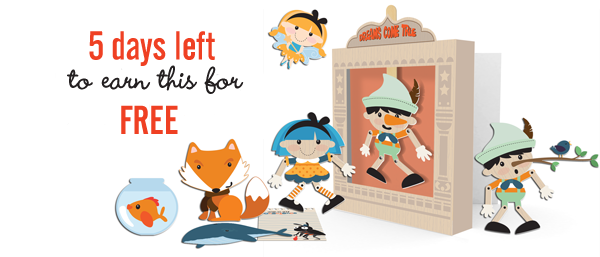
This month, earn the Hi-Dee-Ho Collection! Simply purchase $10 in product between April 1 and 30th and it will be added to your library FREE! See the Hi-Dee-Ho Collection here.

Last week we gave you the entire graphic set for Kawaii Currency! This week get the Kawaii Currency Cut Set absolutely FREE until Sunday at midnight, MST! 

Thursday, April 3, 2014

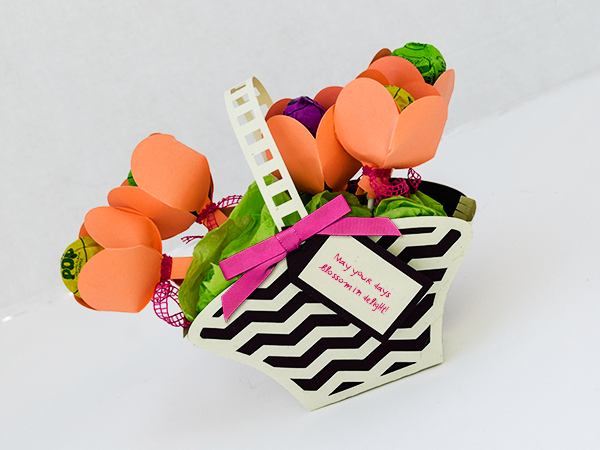
Tulip Pop Bouquet

Brighten anyone's day with this delightful Tulip treat!  A fun easy to make gift, or make an entire tulip bush as a fun centerpiece for a party or shower.  Or simplify your Easter and use as a non-traditional Easter basket. Begin by finding a simple balloon in any party themed cut set. We used Ice Princess Party Cut Set. And the basket is from Tisket and Taskets Cut It Projects.

Bring the balloon in Make-the-Cut or like program. I deleted all layers except the basic balloon.

Next, make a rectangle with the shape tool above, just double click on the rectangle shape. I made my rectangle just under half an inch by just under one inch.
Now you want to center these shapes by right clicking and selecting align>align vertically. And then you want to weld them together.  Right click>shape magic>weld (control +W).
 Now you want to copy the shape 5 times.
 Then you will align again. Right click>align>align horizontally. Then Right click>space>space horizontally. Weld together. Right click>shape magic>weld (control +W).
Now cut out your tulip. You will fold down the center of each two.
Bring around together and glue the 5th piece to the 4th side.
Stick your sucker in and tie with ribbon. Use floral foam to stick your tulips up in, and you have a fun fast gift!

Don't forget just a few short hours left to save 80% on our Kawaii-A-Bunga Bundles. Grab the Cut It version or the graphic and enjoy at the lowest price they will ever be!

Tuesday, April 1, 2014

2 days left to get 80% savings on new product!


kawaii a bunga
We have only two days left to purchase the nearly 1900 new images! We've put them into the giant Kawaii-a-bunga Bundles, and marked them down to unbelievably low pricing for ONLY 2 MORE DAYS! Purchase these products at an incredible 80% savings now!!
This month, earn the Hi-Dee-Ho Collection! Simply purchase $10 in product between April1-30th and it will be added to your library FREE! See the Hi-Dee-Ho Collection here.

Thursday, March 27, 2014

New kawaii-a-bunga bundles! Biggest discounts on new product ever!


 Nearly 1900 new images have landed on LD! We've put in into the giant Kawaii-a-bunga Bundles, and marked them down to unbelievably low pricing for ONE WEEK ONLY! Purchase these products at an incredible 80% savings now!!  All of our graphics include face and faceless versions. Want to cut your Cut It version without a face? See today's tip to learn how!

Only 5 days left! Have you earned your Conscientiously Collection? This enormous collection, valued at $27 can be yours when you spend only $12 (accumulative!) from March 1- 31. See the Conscientiously Collection here.

How to cut items in the Kawaii-A-Bunga Bundle without the face

If you love the Kawaii-A-Bunga Cut It Bundle, but don't want to be limited by having the face, it's super easy to eliminate it in just a few simple steps!

1. First, open up your image in Make-the-Cuts. You can either import the image separately, or use the handy Lettering Delights Image Gallery located directly to the left, by just double clicking on the image. I am using the hammer from In the Garage.

2. Go to the lower right-hand corner of Make-the-Cuts and expand the layers menu.
3. Now, some items may be able to just be deleted by x-ing out that particular layer. I x'd out the cheeks and highlight. (Just click the x next to that particular layer).
4. Last if the face is integrated into a particular layer, just click on that layer. Then right-click. Click on Shape Magic in the pop-up menu. And then select "Blackout." Bye-bye face!

Friday, March 21, 2014

Dollar Day Deluge! A flood of dollar pricing!


Get on board and sail over to the Dollar Day Deluge, where you can pick up all your favorite products for only $1-2! Everything has been wiped down to dollar pricing for 5 days only!
Shop the Dollar Day Deluge now and save on average 75%! And while there, make sure you earn your Conscientiously Collection when you spend only $12.
Have you earned your Conscientiously Collection? This enormous collection, valued at $27 can be yours when you spend only $12 (accumulative!) from March 1- 31. See the Conscientiously Collection here.

And grab today's FREEBIE! Our LDJ Looney Font is free until Sunday at midnight, MST. 

Wednesday, March 19, 2014

Spring Picks on Sale Now!

It's time to think Spring! We've marked some of our favorite Spring picks down 50% off! And with our coupon code: MoreGreenForMe you can save an additional 40% off any purchase of $10 or more!!!
Shop our Spring Picks now!