Showing posts with label New Years. Show all posts

Thursday, December 27, 2012

Thursday's Tip: New Years Favors


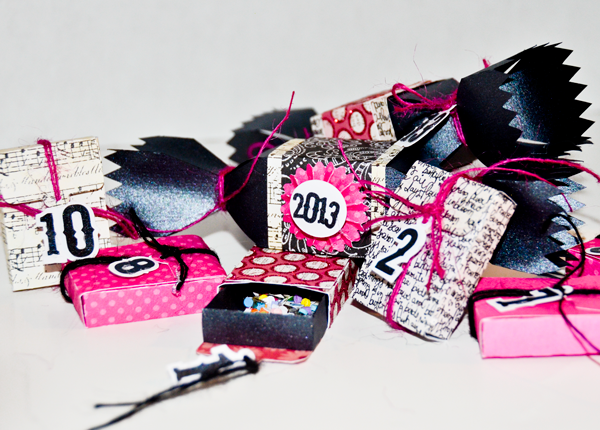
Looking for the perfect party favors this New Years?  These candy poppers and matchbox confetti favors are cute, fun and sure to be a hit! Learn how to easily put these fantabulous favors together and how to cut fonts using Make-The-Cut and your digital cutting machine.

Materials:
Cracker Favor Box Cut It Set
Simple Match Box Cut It Set
LD Petticoat Twist
Accordian Fold Rosettes
Cardstock
confetti
candy

Candy Popper Directions:
Begin by cutting out and assembling your cracker favor boxes. Then embellish with strips of coordinating paper. For extra fun embellishments, cut out some Accordian Fold Rosettes and assemble, then add a circle with the year on top, or create year ties for the ends by following the directions below, on how to cut out fonts using Make-The-Cut.


Be sure to add some yummy treats!


Match Box Confetti Count Down Favor Directions:
Cut out and assemble your Simple Match boxes. I chose top 2 (or image 3), that had the hole cut into it. I sized these down so that when assembled they would be about 2 inches long. To make the fun, font numbers begin by opening Make-the-Cut and click on the text and fonts tab. I used LD Petticoat Twist  for my font. You can use this, or choose another bold font.


Click on the Add text group and type in your numbers and be sure to select "Split by Glyphs." Click accept. The numbers will now be on your mat already split apart. We are now going to merge our "10" by selecting the two numbers, right click and select shape magic>weld.


Now go ahead and spread the numbers apart more. We are going to create the shadow layer for the background of the numbers. Make sure all your numbers are selected and then right click>shape magic>shadow layer. Then adjust the thickness to however you like, but make it thick enough that it can be a solid tag base.


Now turn off the top font layer by selecting the eyeball on the layers menu. And we are going to black out the bottom shadow layer so there are no spaces to cut by right clicking>shape magic>blackout. It should now look like this.


To create a tag circle for it to hang, begin by creating a circle. Do this by clicking on the shape icon at the top left. It's under generic.


Now create a second circle by copying the first (control+c) and pasting (control+shift+v). Now size it down a bit. This will be the center that we will cut out.


Center the smaller circle above the larger and right click>shape magic>boolean join.


Now place above the first number where you want to join it. Copy and paste the circle and place above each number thereafter. Select all the circles and the numbers, right click>shape magic>weld.


Cut out both layers of numbers, assemble and tie to your match box, then fill with confetti!

Saturday, December 31, 2011

Friday Freebie: New Year's Printables


Here's a great way to bring in the new year, and what makes it even better is that it's FREE. Happy Friday, enjoy these New Year's Printables on us and let's celebrate the hope of a great year together!

Thursday, December 29, 2011

Thursday's Tip: Using Photoshop and the TMNT Tool to refrost some Frosting!

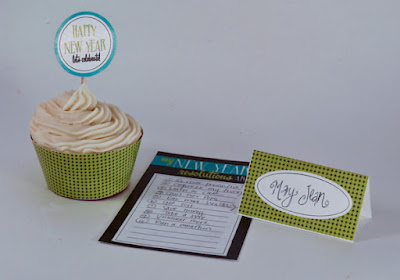
Have I mentioned that I love Sheri Berry's Frosting Set? Not only is it stunningly beautiful, but you don't have to be limited to use it just for Christmas. I decided for our New Years Party we are having this year, that this would make the perfect decor. With a couple easy tweaks they are 'New Year' ready!

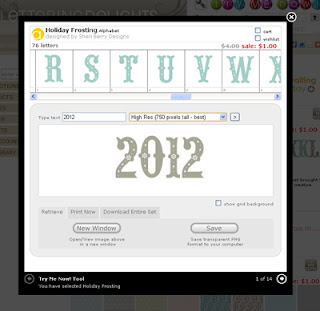
Using the Try Me Now Tool (TMNT) and Photoshop (or other photo editing program) you can easily make this set New Year ready too. Make sure you are signed onto you account at LD and begin by going to the Holiday Frosting Alphabet and click on the Try Me Now icon in the upper right hand corner of the alphabet. In the text box, write your first title that you want to use. I'm starting with 2012 that I'm going to put on one of the Holiday Frosting Labels to turn into a cupcake topper. Change the resolution to High and click save. This will automatically save the title you typed as a full resolution .png.

In Photoshop or like program, open up the Holiday Frosting Label you want to use in Print Cut or Graphics. I'll be using 1 and 2 for my toppers. Open up the title you just saved from the TMNT and copy and paste it on top of the label. Go to the layers menu, select the 2010 layer. Now click on the drop down arrow on the right hand of the layers menu and select convert to smart object. This will allow you to resize you number without loosing any resolution. If you don't have an option like this sizing down isn't as big as and issue and if you need to size down without you probably wouldn't notice a difference. Hit Control+T to transform your numbers. Holding shift and dragging at the corner at the same time to maintain a uniform shape. Continue to re-size until it fits in the center of the circle.  Now the final product will actually be too big to be a cupcake topper. Once I had everything where I wanted it I re-sized the entire image so that the diameter of the circle was about 1 1/2 inches. I repeated the entire process Using the first label, and the words Happy New Year.


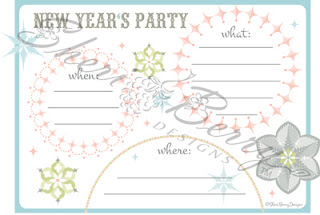
For my invitation, you could easily use the invite number 8 from the Holiday Frosting Potpourri as is, since is just says 'Holiday Celebration', or if you want to make it more specific with another easy tweak we'll change 'Holiday Celebration' to 'New Year's Party.'

Begin by opening the invitation in Photoshop or other like program. Using the brush tool, select some white paint and carefully brush over 'Holiday Celebration.' Go to the LD website and back to the Holiday Frosting Alphabet and following the same directions as above using the TMNT tool type in 'New Year's Party.' Save the title and open it in Photoshop and paste it above the invitation. Size down the title and put into place where the old title was. Now print some coordinating envelopes, some fun snowflakes, or even print out the words HAPPY NEW YEAR and create a fun banner to add to the decor. Everything you need to make a beautiful Holiday Celebration is all in Sheri Berry's Holiday Frosting Bundles. On sale now during Dollar Days! Right now take $20 off a $50 purchase with coupon code: newyear20.