Materials:
Pucker Up Collection
LD Petticoat Twist
No Rhyme SVG
8 1/2" by 11" Printable Sticker Labels
Paint Can
Ribbon
Goodies for the inside
Clear Coat Acrylic Gloss Enamel
Front Label:
To make the front label using Photoshop, check out my How-To Video Tutorial here! I use the Pucker Up Collection, mainly using the No Rhyme Graphic set, the Pucker Up Papers. My font I used to write the poem is LD Petticoat Twist. After you have followed the tutorial, print the label onto an 8 1/2" by 11" Printable Sticker Label. I then sprayed it with a clear coat acrylic gloss enamel. Once it was dry I adhered the label to the front of the can.
Here is what the finished label looks like:
New Mommy Survival Kit Title:
Unfortunately we don't have a Pucker Up Alphabet, but follow this easy photoshop video tutorial to make your own words.
Top Sticker:
To create just a round sticker for the top of your can, first measure the width of the lid and decide how big you want to make your sticker. Then make a new document exactly that size. I made mine 5.25" by 5.25".
Using the circle marquee, create a perfect circle by holding down the shift key and then starting in the top left corner of the square drag the marqee all the way to the opposite corner. Go ahead and fill your marque using the gradient or paint bucket tool (G). It doesn't matter what color you fill it because we are going to cover it with paper. Create a new layer, like we did in the video tutorial for the label, by pressing shift+control+N. Create a 2nd smaller circle by holding down shift and fill it. Follow this step again, creating a 3rd circle and filling it with white. If you like, add drop shadows to each layer by double clicking on the layer, and clicking on the drop shadow option in the layers style box. To add paper to each layer simply open the Pucker Up paper you want to use, select the paper (ctrl+A) and paste (ctrl+V) it directly above the layer you want it to cover. We are now going to create a clipping mask with that paper, by right clicking on the paper layer then selecting "Create Clipping Mask." Follow these steps with your additional layers.Your finished sticker should look like this:
Just print this on your large sticker labels and spray with your clear acrylic gloss and adhere to the lid of the can.
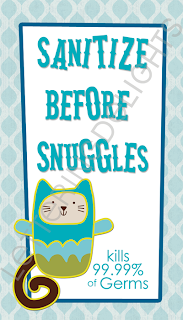
 Hand Sanitzer Label: I thought it would be more fun to make a cute label for the sanitizer that went with the can. The label was essentially created the same way the one for the can was created, just on a smaller scale. You will want to measure the label you removed from the sanitzer you bought and create a document that size. I pasted the paper I wanted to use above the bottom layer, and this time changed the opacity so it wasn't as bright. To do this go to the layers menu and select the layer you want to change and click on the arrow on the top right hand side and slide the opacity down to where you want it. Follow the directions on the video tutorial for the label to add the image and then the wording using LD Petticoat Twist. Print onto the sticky label paper, spray with clear acrylic gloss and adhere to your sanitizer.
Star Tag:
I just created the star tag hanging from the top of the can, by cutting out one of the stars from the No Rhyme SVG and punching a hole through it!
Here you can see all the stuff I put in the paint can, there are lots of other ideas on Pinterest as well, I still had to get one thing for the baby, because frankly, who can resist!


 Digitally I cut my mom out of the background of the picture I used. You can do this by erasing the background, or using the want or lasso tools to select and delete the background. This gave me a backgroundless image that I was free to play with. So after pasting her into my 5 by 7 canvas (so that I could ensure the right sizing), I then began to bring in graphics and elements from the


