Need a fun way to get your child excited about going back to school? Or maybe just a little cute good luck before the next big test! Create these easy to make favors using the new
Wise Owl Collection to brighten their day!
This favor could easily be made as a print and cut, or a cuttable. But today I'm going to demo a photoshop print and handcut version, for those that don't have cutters.
Materials:
Wise Owl Graphic Set
Talk Cut It Simple Shapes
Ld Hipster Child
Smarties
Hot Glue
Directions:
Begin by opening your
owl in photoshop as well as the smarty pants phrase. I used a talk bubble from the
Talk Cut It Simple Shapes to place behind my smarty pants phrase. And used
LD Hipster Child for "Good Luck" and "(like you'll need it!)." Even if you don't have a digital cutter, you can used any of the Cut It products as a graphic. They come in several formats, just open up the pdf version in photoshop, or if you have illustrator, open up the ai version and paste it into photoshop. Use the type tool to write the additional type and center it on your talk bubble.
To create the back of the
owl copy the owl and paste another version next to it. Now if you go to the menu bar at the top of photoshop click on edit>transform>flip horizontally. This will make a mirror of your originally image so that you can have a nice back side.
Now I'm going to select my brush tool, and then use the eye dropper to select the orange on the base of the owl and color over the eyes and beak.
Now you can just print it out like this or if you want to get more technically correct, continue on and I'll show you how to create the tail feathers over the butt.
Begin by creating a rectangle marquee around the tail and body.
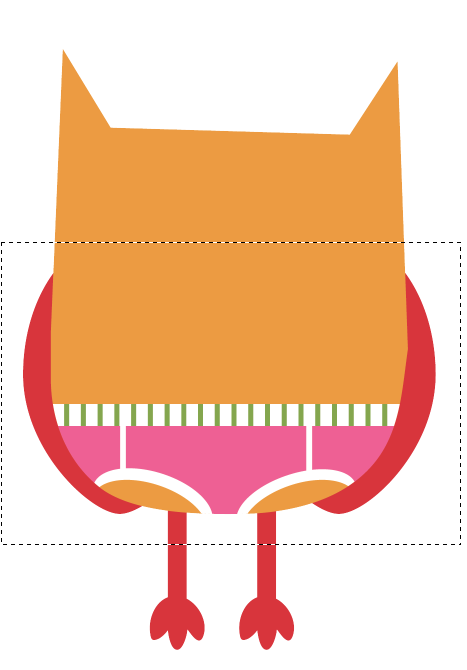
Use the wand and click on alt while you click on the area outside the body so that the marquee will select around the body. Create another layer on the layers palette, by hitting shift + control + N. I named this layer wings.
I then used the eyedropper tool and selected the reddish color on the owl. Select the paint bucket and fill the marquee with the red in the new layer.
Now since its its own layer you can do some additional shaping to the tail/wing feathers with the brush and the eraser. I erase away some of the red so the underwear could peek through, and just added some curve to the back with the brush.
Now I printed out all my pieces. I printed out 3 fronts and 2 backs just to have some layering.
I layered the eyes, beak, underpants on top using foam sticky dots, and then an additional wing piece for the back. Then take your hot glue, gluing the front to the back by the legs, then just around the body, leaving the top open. Fill with some smarties and your done!


No comments:
Post a Comment